


Laparoscopy Training at Home: Guide for Beginners (Part 1)
Hello, (future) laparoscopy masters! Welcome to the first part of our guide “How to practice laparoscopy at home?”. Why in two parts? Because the topic is so extensive that one post would definitely be too long. Laparoscopy is a true revolution in surgery, but like any skill, it requires regular practice. And this is where […]

Hello, (future) laparoscopy masters! Welcome to the first part of our guide “How to practice laparoscopy at home?”. Why in two parts? Because the topic is so extensive that one post would definitely be too long. Laparoscopy is a true revolution in surgery, but like any skill, it requires regular practice. And this is where home training comes in – your new best friend on the road to perfection.
What do you gain by practicing at home?
➡️Flexibility – you train when you want, even in your pajamas
➡️Repeatability – you can practice difficult techniques without time pressure
➡️Less stress – because your own four walls are not an operating room, right?
In this part, we’ll focus on the basics:
How to create a mini training center at home, what tools are necessary, and where to start with exercises?
Remember, home training is a great supplement, but it won’t replace clinical practice. It’s like learning to ride a stationary bike – useful, but eventually you have to go out on the road. Ready? Let’s start our adventure with home laparoscopy!
Choosing Your Training Space
Preparing for home training is a key step in developing laparoscopic skills. Let’s start with choosing the right place in your home. The ideal solution is a stable desk or table where you can practice comfortably. Make sure you have good lighting – natural light works best, but adjustable lamps are also a great option. Also, ensure you have enough space to move freely.
Investing in a Professional Trainer?
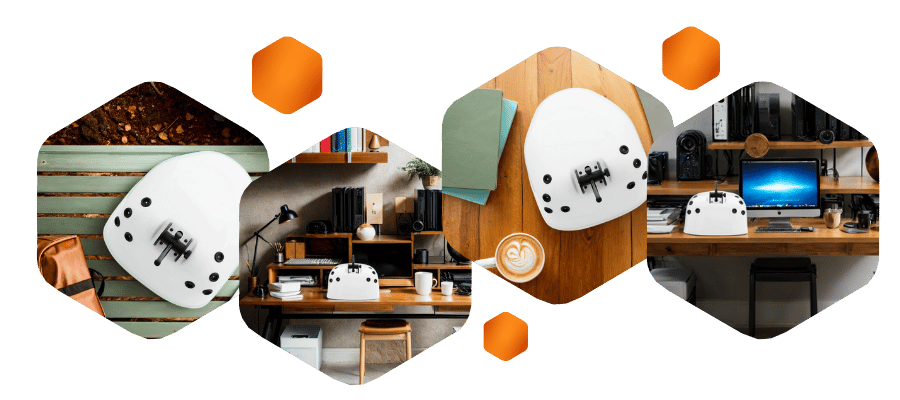
The next step is choosing the right training tool. Why choose the Surghero trainer? First of all, it provides realistic training conditions, similar to those in an operating room. This helps your skills develop in the best possible way. It’s also easy to use, allowing you to focus on training rather than setting up equipment. However, the choice is yours – if you prefer a DIY trainer, that’s great too!
Basic Equipment
Regardless of the trainer you choose, you’ll need some basic equipment. A set of laparoscopic instruments (grasper, dissector, scissors, laparoscopic needle holder) is essential. You’ll also need a computer with a monitor or a laptop to help you observe your progress. Don’t forget about materials for practice – training modules or anything else you decide to use, such as sponges, rubber bands, or even a banana or an orange.
Let’s start training!
Whether you’re just beginning your laparoscopy journey or you already have some experience, you’ll find something useful in this guide. If you feel you’re already advanced, don’t worry – we’ve prepared special content for you in the next part of the guide. For now, let’s focus on the beginners in laparoscopic surgery.
Exercises for beginners:
In the early stages of training, it’s crucial to familiarize yourself with laparoscopic instruments. Learn their functions, how they work, and their uses. This is the foundation on which you’ll build your skills. One of the biggest challenges for newcomers is getting used to the lack of depth perception on the monitor. This takes time and practice, but don’t worry – it gets easier every day! That’s why the best starting exercises are:
➡️ Moving beads from one place to another
➡️ Stretching rubber bands onto pegs
➡️ Transferring objects from one instrument to another.
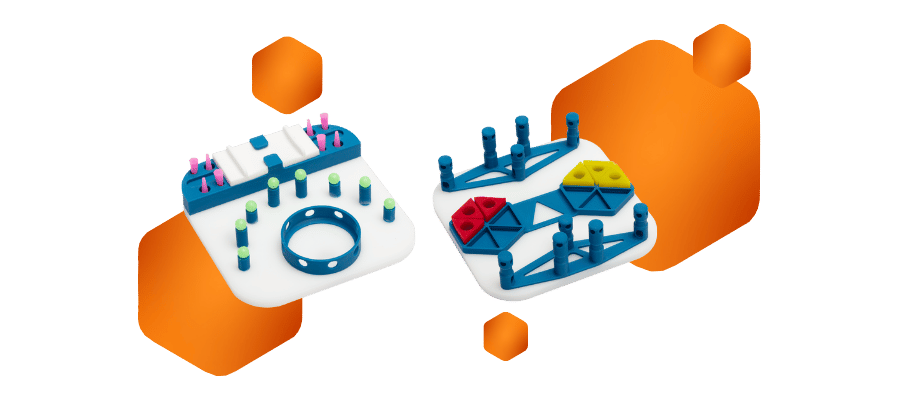
These exercises will help you develop hand-eye coordination and teach you to operate instruments precisely in 3D space while observing a 2D image on the monitor.
Exercises for intermediate level:
If you’ve mastered the basic exercises, it’s time for more challenging but essential tasks. At this stage, we focus on:
➡️ Single suture exercises
➡️ Knot tying
It’s worth noting that many experienced minimally invasive surgeons consider suturing the most difficult skill in laparoscopy. That’s why it’s important to dedicate more time to these exercises and perfect them. Remember – patience and regular practice are the keys to success!
No matter what stage you’re at, remember that every step in your learning is important. Consistent training at home is a great way to develop laparoscopic skills. Be patient with yourself, enjoy your progress, and don’t forget to take regular breaks.
Safety and Hygiene During Training
Even though you’re training at home, don’t forget about safety and hygiene rules. These are key elements that will prepare you for work in a real operating environment.
Cleaning Your Tools:
After each training session, clean and disinfect your tools thoroughly. Use appropriate disinfectants, which can be similar to those used in hospitals. Remember, clean tools are not just about hygiene, but also about taking care of your equipment – this will extend its lifespan.
Ergonomics of Your Training Station:
Good posture during exercises is just as important as the exercises themselves. Set up your trainer at the right height so that your arms can be relaxed and your wrists straight. Place the monitor at eye level to avoid neck strain. Remember to take regular breaks – every 30-45 minutes, take a 5-minute break to stretch and relax. Also, make sure your training area is well-lit. Avoid light reflections on the monitor that can make it hard to see.
Remember, good habits developed during home training will carry over to your work in the operating room. By taking care of safety and ergonomics, you not only increase the effectiveness of your training but also protect your health in the long run.
Summary
Home laparoscopy training is a great way to develop your skills. Remember to choose the right tools, follow a progression of exercises, and prioritize safety. Regular practice and patience are the keys to success! Good luck on your laparoscopy journey! We’ll see you in the next part, where we’ve prepared more tips for advanced learners. Be patient and enjoy your progress – it’s the first step toward mastery!

